Anatomy of a Style Crush
Leave a reply

After attempting two comparisons, I would have to conclude both programs present a considerably different starting point, whether one uses the auto-correct features or not. In other words, the outcome of any creative manipulation of an image, given these differences is highly likely to create a different outcome. One concern that remains with me is the appearance that Lightroom has less flexibility in its sliders than in Capture One. I am not sure what to make of this finding.
(If you need to look at a larger version you can click the images to enlarge them.)
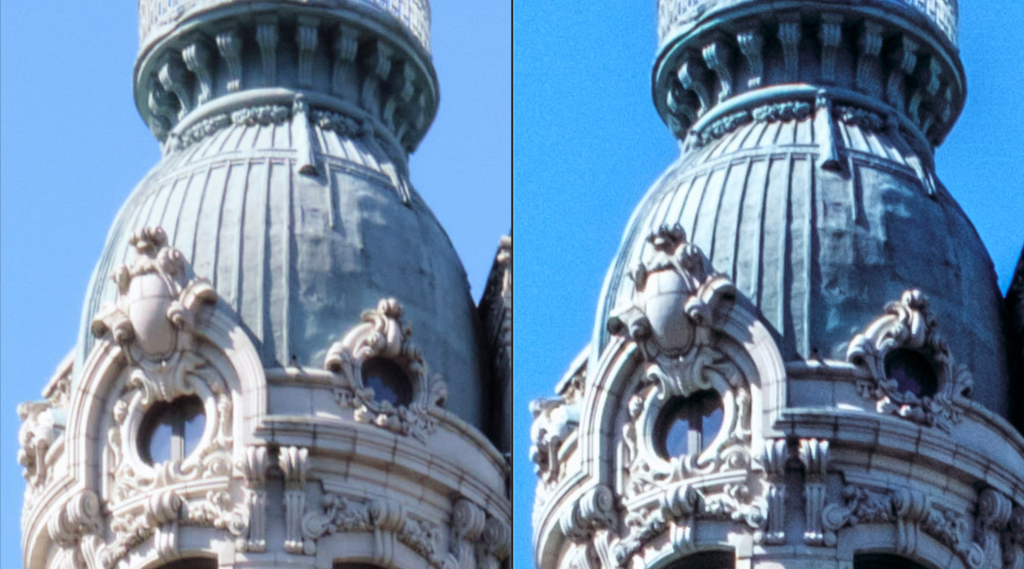
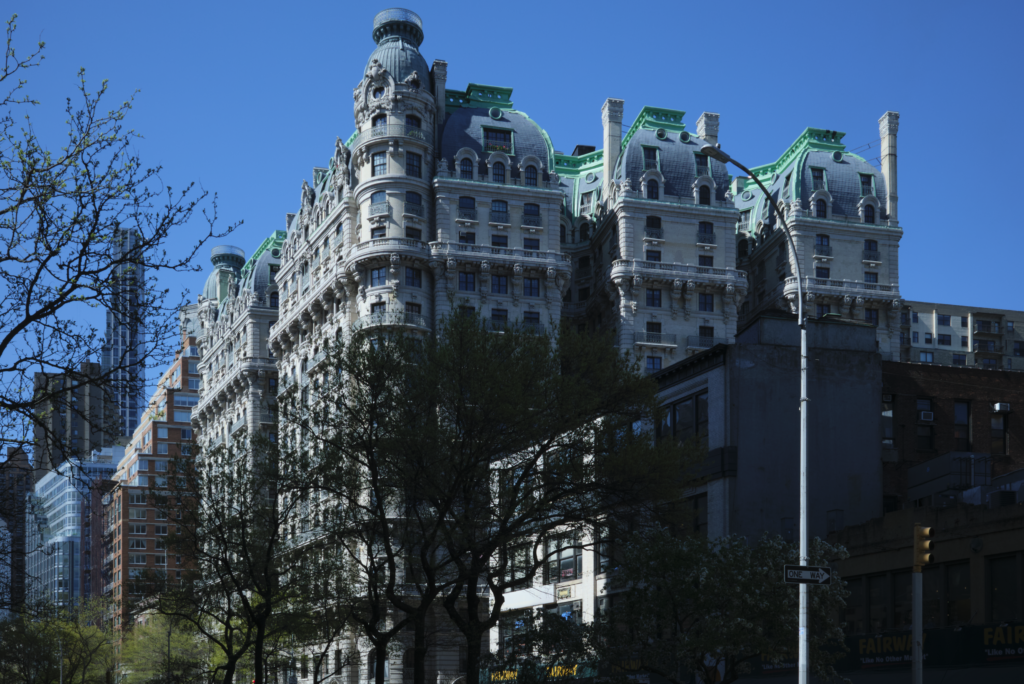
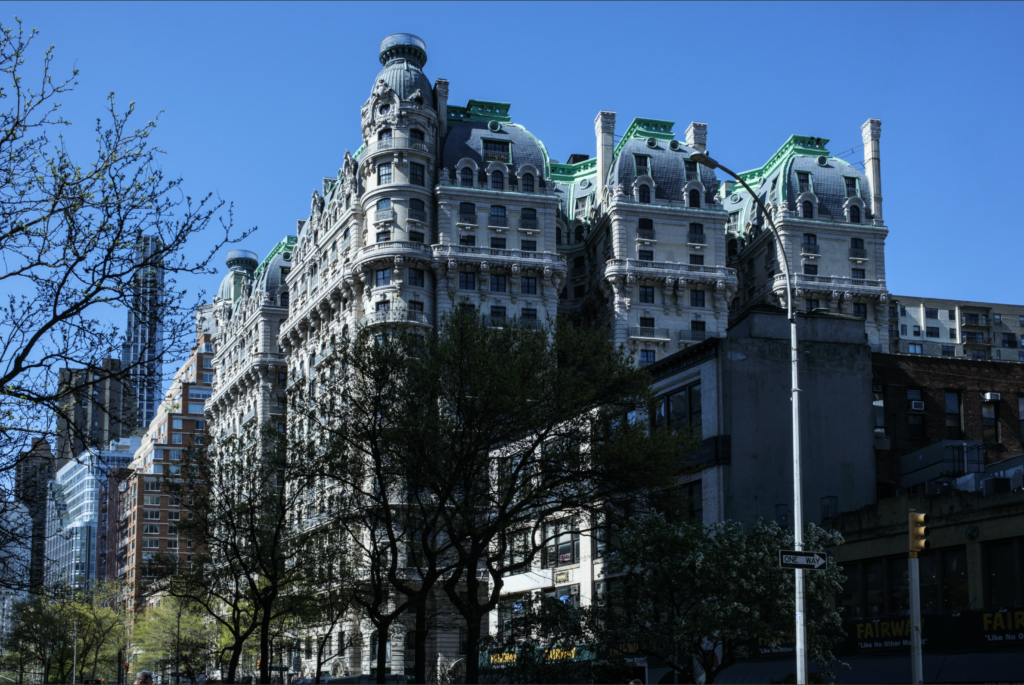
The two images below are a result of auto-processing through Capture One and Lightroom. The comparison below shows a considerable difference between the two processors. One way to approach a comparison is to look at which produces the best image quality, but given the differences, one’s tastes may well override a conclusion on technical grounds. One thing is sure: your starting point in either program is very different, which, in almost all cases, will heavily influence the final image. However, experts in the field have shown Adobe produces a more “wormy” image than Capture One and some other processing programs when dealing with X-Tran images. Given what I have seen in this comparison, I suspect a distinct difference in colour representation, dynamic range, clarity and shadow recovery can be seen between the two processors.
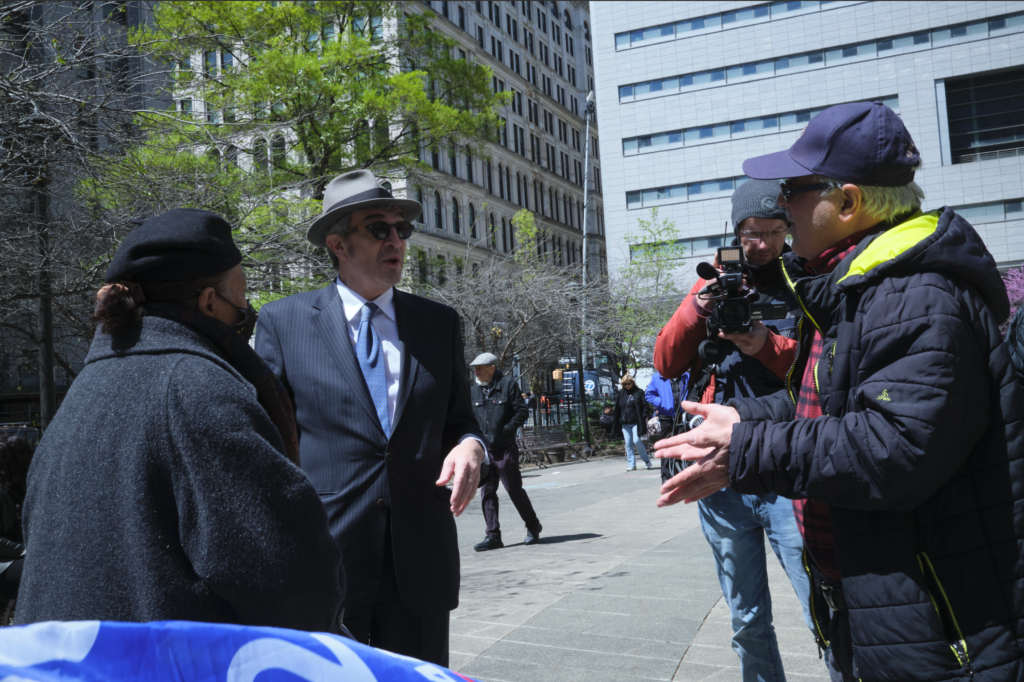
The images were taken with a 40-megapixel Fujifilm camera using a 35mm equivalent lens at 1/250 at f/11 and an ISO of 320. The image on the left, processed through Capture One, appears to have fewer “wormy” artifacts and less noise. In terms of dynamic range, trying to recover detail from the dark areas is limited in Adobe, unlike in Capture One; there does appear to be more range. In terms of tone and presence sliders, they are different in how they render, but it is arguable which is better.
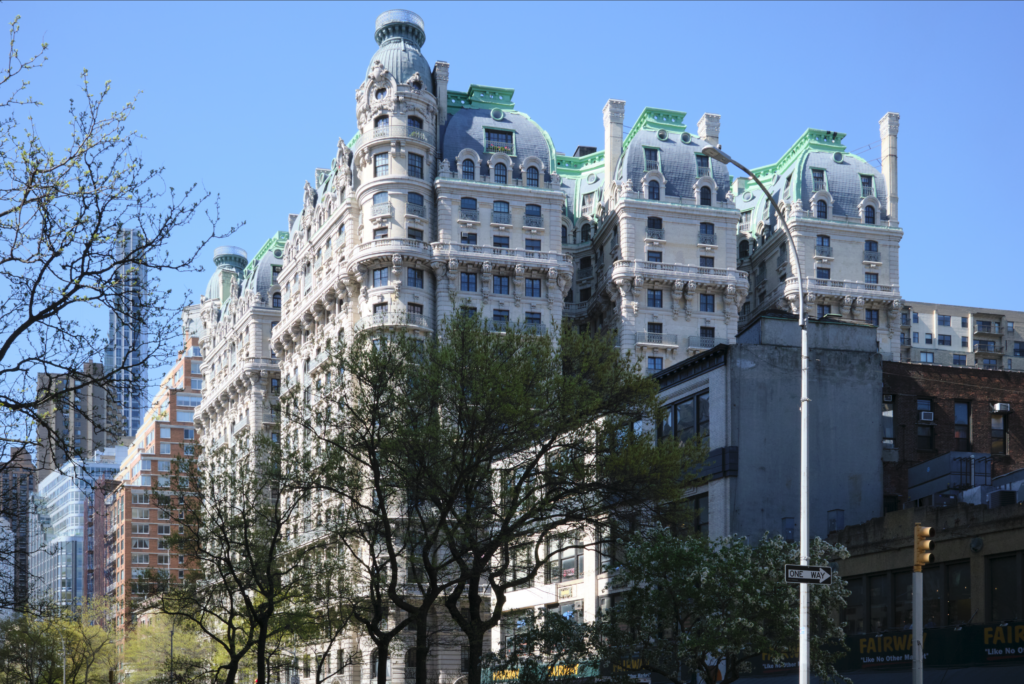
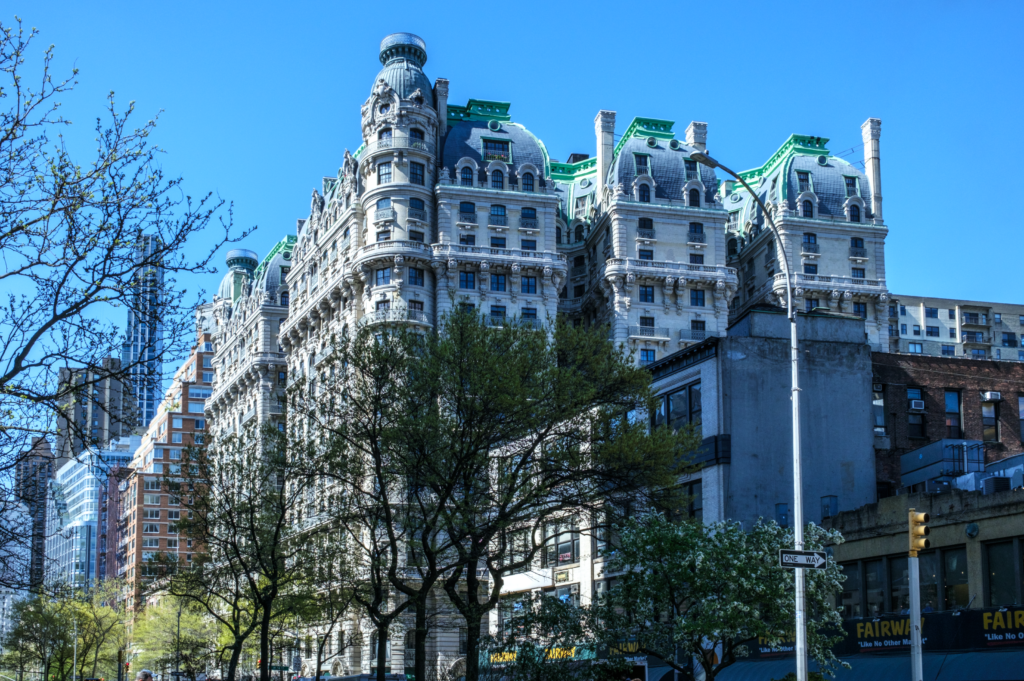
The two images below are the RAW files presented by each processing software with only the corrected vertical angles, using each processor’s automatic function. In Lightroom, a profile is required, and after going through all of Adobe’s profiles and Fujifilm, I felt Provia Standard seemed the cleanest. Most of the Adobe profiles appeared “wormy.” I am unclear why this is required in Lightroom, but these profiles can change the image quality significantly.
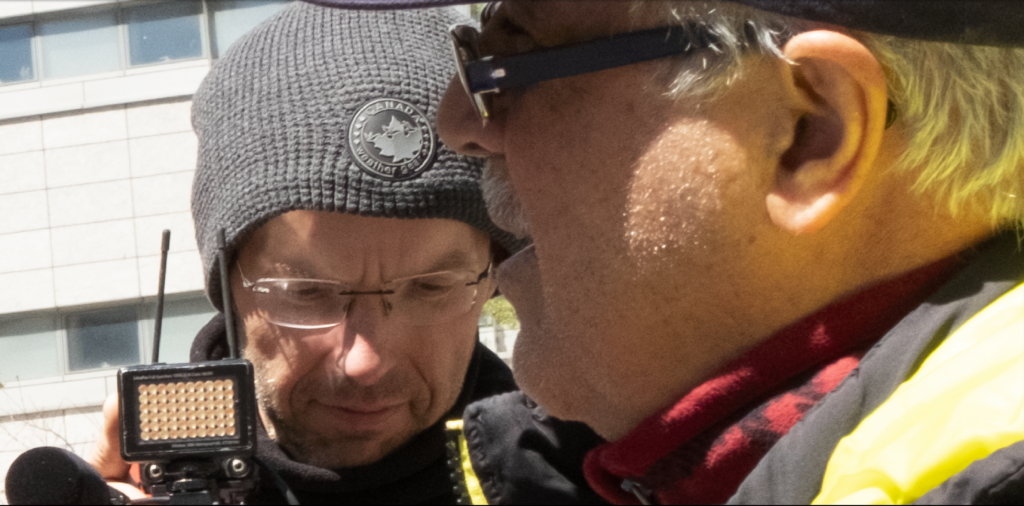
Next, each image was auto-corrected using the automated function in each program. The blown-up image follows each one at approximately 300.


The final two images are run through the same automated function in NIK software, their clarity bump preset.


This second comparison uses an image created on a 40-megapixel Fujifilm camera using a 35mm lens, with the following settings: 1/320, f11 and an ISO of 500. Instead of using a Fujifilm Film Profile this time, I used an “Adobe Color” profile.

The two images above show the initial presentation in Capture One and Lightroom, with no adjustments. They are similar but not identical

The two images above, at 300%, are the final result of the processing below. In other words, the image results from the auto-processing in Capture One and the Matching done in the second Lightroom processing. Keeping in mind the matching done within Lightroom could never be considered precise, given the different ways the tow programs approach processing.
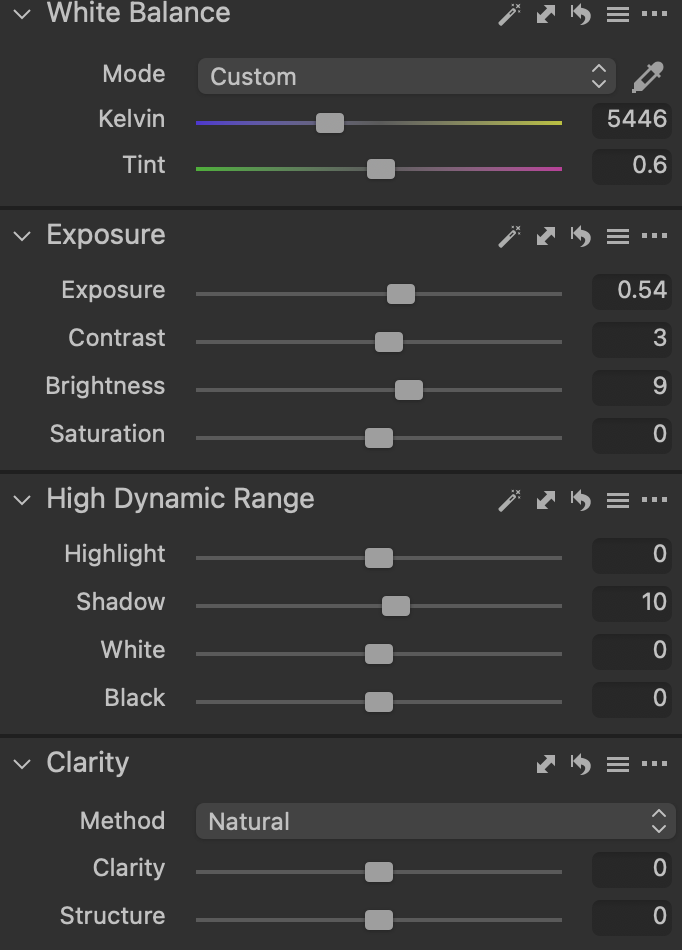
These adjustments were made by the automatic setting in Capture One to modify the image below. The Kelvin scale moved from 4525 to 5446. All the other adjustments are registered next to the sliders.


In the image below Lightroom’s automatic setting took a very different take on the Kelvin scale. Rather than increasing it, it chose to drop the temperature from 4525 to 4050. In addition, the adjustments to the sliders were much more radical. Leaving less room for modifications. It also introduces clarity and saturation, which Capture One did not adjust.

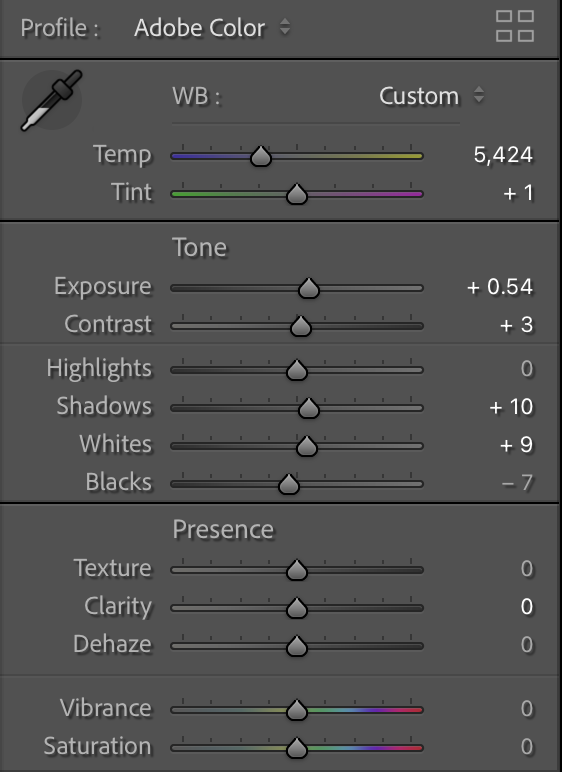
To create a better comparison, I have readjusted the Lightroom sliders to approximate the adjustments made by Lightroom. As Capture One has a different method of dealing with Tone and Presence and requires a profile setting, this is as close as I could get to the image above and the settings to the left.